Monday, October 7, 2019

Schwinn Paramount -- Finished cleaning the frame (the rear portion)


Before cleaning
overview of the two chainstay tubes.  The bump at the bottom left of the picture is for the rear derailleur cable housing.

The RH chainstay tube has a clear tape protector on it.  This area is damaged and dirty... 

The chainstay protective tape is coming off at the bottom front... 

This is the LH side chainstay tube, looking at the front portion from between the tubes towards the outside of the bike.  There's a patch of adhesive left from some sort of sticker that used to be on the tube.  Also, there's a area on the inner side of the tube where the paint has been rubbed through from the tire rubbing on it at some point... 

The LH rear wheel dropout.  Near the adjusting screw, there's an area where the metal has been damaged by something pretty sharp and hard, causing the metal to peel back and create a very large metal burr.  Will use a chisel to take off the burr..  Also, the area is pretty dirty...


RH side rear wheel dropout with the deraileur hanger.  The adjuster screw is missing it's "head."  This area is very dirty also.  To the right side, you can see the clear chainstay protective tape's rear end... 

closeup showing how dirty the area is...

This is the rear brake mounting location on the seat stays.  A little bit dirty... 


The LH chainstay showing the adhesive residue.  I used an adhesive remover liquid to take this off.  It came off nicely with the chemical remover.

LH rear wheel dropout  as seen from the LH outer side.  There's lots of paint damage/chips all over the chainstays and the seatstays...

Peeling off the damaged clear chainstay protector... 


After Cleaning
The seat post clamp area, after cleaning 


This is the last area of the top tube that needed cleaning (had to move the frame on the repair stand to get to it).  The sticker is not too bad.  The letter "G" is a little bit damaged... 

There's a couple of small dents in the top tube but it's not too bad.  Should not have any structural effects...

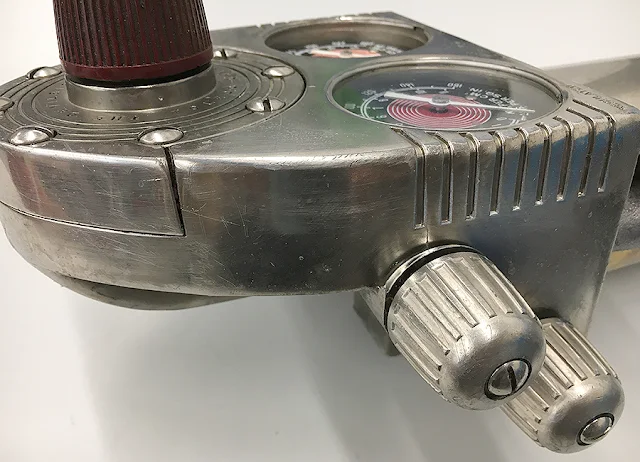
Vintage DeVilbiss Air Pressure Regulator - cleaned the LH dial knob area of the top section

Forgot to take "before" pictures...

All the pictures below are after cleaning


Kowa Tool Cart -- Cleaning the Inside of the Upper Lid

Before cleaning (this is the inside of the upper tool tray lid) 

After cleaning (not a dramatic difference) 

Not the right tools but I added a few of the missing wrenches in the holder.

Maritime Rule -- Continued Cleaning


Applied the rust remover and let it work about 10 minutes before removing it with a pad of scotch pad.

Overall, it's pretty close to being done with the cleaning. 

This end is pretty much done. 

This end still needs more rust removal... 

Drill Bit centering guide

Needs the drill bit (about 3/16")...  (this is handy when trying to drill a centered hole through another hole in something (like a door hinge...)


After cleaning

Pomona -- August 11, 2019 - GM Steering Wheel -- Part 43


After cleaning...
Looks pretty nice after cleaning

Had bought this horn button adapter at the same swap meet.  Installed it.  Now I need to see if I have a GM horn button that fits this wheel...

Brass Handles - Starting the cleaning process...

Brass has corrosion resistance properties.  It forms an oxidized protective surface layer that protects the part from further corrosion.  Once the oxidation layer is removed (as in the RH part), the raw brass becomes visible.


Finished cleaning one of the handles...


Cleaned the other handle & put the crews back on


Paradise Valley Model A Swap Meet -- 9/28/2019 -- mid to late '70s Ford Steering Wheel - Part 5


The splines must have gotten damaged (either on the column shaft or in the steering wheel; most likely on the wheel itself...).  Someone cut and installed a "shim" probably from a thin steel can of some kind.  It probably worked well (due to the interference fit).