Tuesday, May 12, 2020

New "cage-less" water bottle for the bike

I applied a penetrant before removing these screws, just in case.  The top screw was somewhat corroded and took some effort to remove.  Luckily, the threads were not damaged.  The bottom screw came off easily.  The top one is subject to more of my sweat... 
This is the penetrant I used before removing the screws.


These are the mounting screws that hold the bottle (no cage).


The bottle has built-in "clips" to attach to the "studs" on the bike.  I had bought this a long time ago but finally got around to trying it out.

On the downtube, I have a "normal" bottle cage.

This is how the bottle looks when mounted to the seat tube.  I was a little concerned that it would not be secure when riding over rough pavement.  I've used it several times so far and it seems to be very secure.

Garage Organizing - part 3

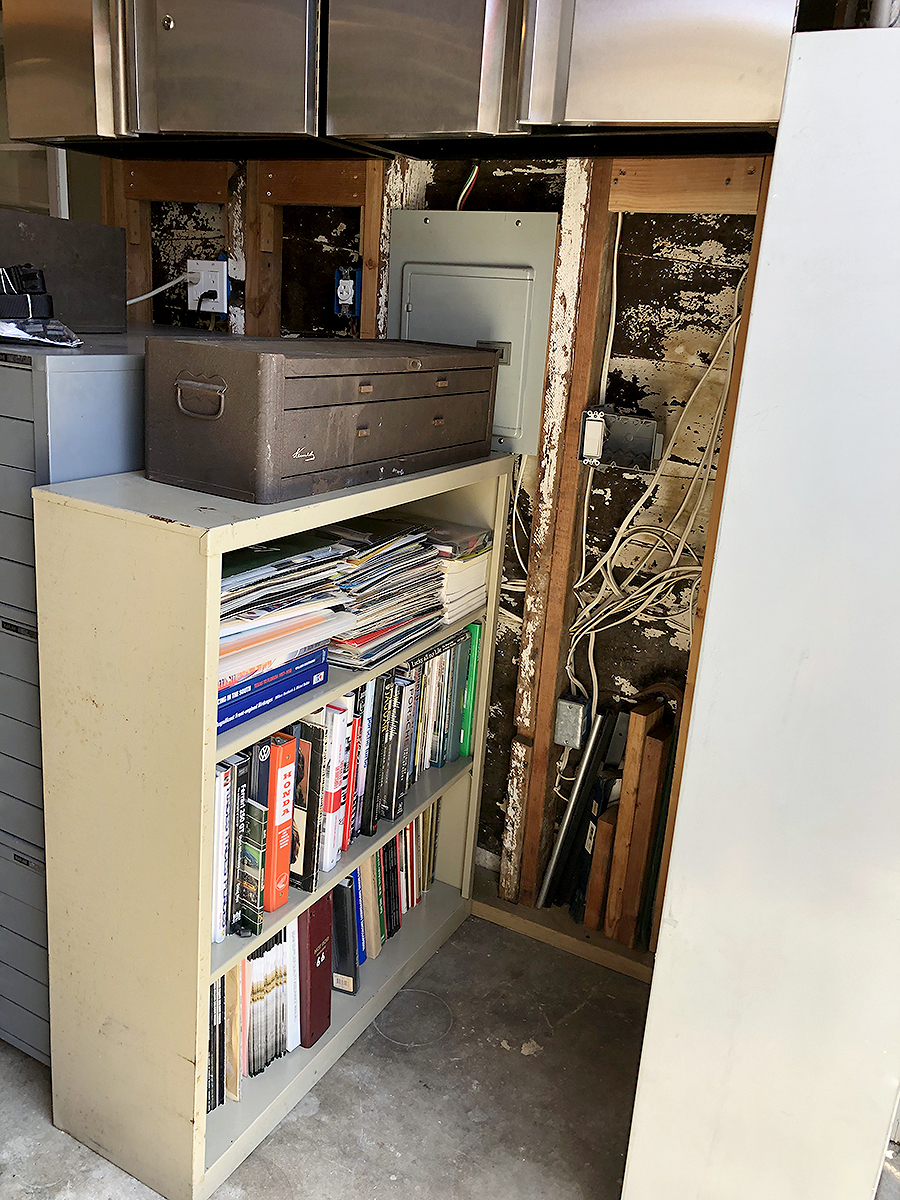
Rotated the lower bookcase to be up against the wall.  It's just a little bit wider than the gap between the flat file and the tall book case but it will work.  The light switches are just above the top of the book case & are not blocked.

I had to move the tall book case away from the wall slightly but it's still not bad.

I'll use the space above the book case for storing a tool box an other stuff.  They'll be easy enough to move if I need access to the circuit breaker box or the light switches.

t
This Kennedy tool box base fits well but the space above it is now too narrow to put a tool box on top.  Will have to figure something else out.

Light switches...

Monday, May 11, 2020

Marina Del Rey -- Sunday, May 3, 2020 -- went with S

The bike path was pretty busy.  As usual, it was very windy riding out to the beach.  I rode in front to block the wind.  On the way back, it's a nice tailwind.  We averaged over 15 mph on the ride.  


The water is so red.  It was near clear a few weeks ago...

Garage Organizing - part 2

The power outlets (120 & 220) are going to end up behind the Kennedy Tool Box Base cabinets.  Part of the compromise to be able to utilize the back of the flat files for storage...

This tall & narrow book case can move a little more away from the wall because the garage door behind it is the one that's used the least and doesn't really need to be accessible.

I think I'm going to rotate this book case so that it's up against the unfinished wall.  It's low enough that it won't interfere with the light switches.

The small blue open storage next to the window can be moved up to create more space under it for a tool box.  Also, the stuff on top of the corner storage cabinet can be better organized.

It won't stay this way, but it's really nice to have a completely empty horizontal surface!

The batter chargers will be stored on top of one of the Kennedy tool box bases, so that they'll still be somewhat accessible.

Sunday, May 10, 2020

Marina Del Rey -- Saturday, May 2, 2020


Still a lot of people on the bike path.  On the weekends, it's pretty crowded.  During the week, it's still busy but more reasonable. 

The red tide has been around for quite a while now...

Garage Organizing - part 1

Actually, this is not part 1.  I've already been working on it quite a bit by the time of these pictures.
I'm just using the part # as a way to keep track of the posts from this point on, probably about 5 pictures at a time...

Moved all the stuff that was sitting on top of the beige flat files outside, along with a lot of the stuff that was sitting near the high-back chair (the chair is the original seat from the 914, with the seat track intact that I put on a wheeled stool base probably about 30 years ago!

Trying to figure out how to organize stuff on top of the gray flat files...

Although there's still a lot of organizing to do, the open space and empty horizontal surfaces is what I'm going for...

The wood cabinet in the front of the picture is going away (sell, donate?).  Don't have space for it with the other stuff that needs to come back into the garage...

Thinking of moving the book case on the right side of this picture...

Stuff that came out of the garage that need to go back in...

most of the stuff in this picture need to go back in the garage, except for the stuff under the blue tarp.  That stuff is stuff I need to sell, give away or donate...

Friday, May 8, 2020

Bike ride to the Ocean (Marina Del Rey) - Friday, May 1, 2020

Pelicans flying in aerodynamic formation

Lots of boating activity in and out of the marina (the boat docks are just below the tall buildings)

Back from the bike ride


Replacing the cold water supply hose to one of the sinks in the larger bathroom

There's corrosion on the braided steel line for the cold water supply hose to the faucet on one of the sinks in the larger bathroom.

Like with the small bathroom hot water supply hose, I'm replacing with a non-steel braided line.  I'm hoping these will last or not degrade like the steel braided lines...

This is the faucet wrench to reach the hard to get to connection at the bottom of the faucet.

After hose replacement...

These hoses have a conical rubber grommet at the interface to the faucet/shut-off valve.  So, the instructions say to hand tighten then add a 1/4 turn with a wrench.  It just needs to compress the rubber seal but not over-tighten it.  It seems to work well and the connection is water tight and not at all loose.

The old line does not have a rubber seal, instead there's a rounded metal interface so the nut appears to need to be pretty tight to seal properly.  It took some force to get the nut off but luckily it came off without damaging something else...

There's some pretty bad corrosion on the steel braided line.  You would think this would be made of stainless steel that's more corrosion resistant than this... 

Another spot with corrosion

A couple more spots of corrosion...  I'm not sure why certain spots are corroding.  Perhaps it's the stress in those areas or there's more of a chance of moisture retention in those spots?

Thursday, May 7, 2020

Adjusting the water pressure regulator to the house

First loosen the locking nut (on the bottom)

Only took about a 1/4 turn to loosen

Then adjust the water pressure.  Turning counter-clockwise lowers the pressure, which is my intention

Turned it about 1/2 a turn.  This seems to have done the trick.  The water pressure in the house is down slightly but not enough to feel like it's low.  This will reduce some of the strain on the plumbing and joints in the house.