Monday, December 28, 2020

Wednesday, December 23, 2020 -- Manhattan Beach Pier

Pretty overcast today.
The sun is hazy (the camera/picture exaggerates the brightness of the sun).


Quite a few people at the pier.
Sat at this bench across from my usual spot to take a short break before riding back home.


At the Dockweiler beach parking lot where I cross over from the bike path to the service road...


Bike shoe "bodge" #3 -- mechanical reinforcement

I had glued a plastic reinforcement behind the tearing part of the plastic of the top strap.
I removed the plastic & cleaned off the last adhesive I had tried, using a sharp blade.

After cleaning off the left over adhesive, I made a cardboard template for a sheet metal reinforcement.
The white material is the cardboard template.

I traced the template onto a small piece of stainless steel sheet that I already had (leftover from something I had bought years ago).

I had gone to the local hardware store to buy some small machine screws and nuts.
I wasn't sure which of two sizes that appears to be about the right size would be best.  So, I bought a dozen of each of the two sizes.

This is even smaller than the #4.
I decided to use these on the repair...


I held the sheet metal reinforcement in place using these spring clamps and drilled the holes for the screw on my drill press.
The hole is a hair undersized so the screws had to be "threaded" through the holes.
It made for a very tight fit with no slop at all.


The blue color is a protective film on the stainless steel.
I removed it once all the holes were drilled.


Decided to use 5 screws.

I drilled this one hole too close to the others so the nut was a very tight fit.
I managed to get the nut on with some "persuasion."


Done.
Will try it out later today on a ride...


My other pair of the same bike shoes, where the entire part had completely separated.
I decided to do a similar repair as the pair above.
But, since it's completely separated, I had to put a reinforcement plate on both the bottom and the top of the strap.

I made paper templates & cut the stainless steel.
The top reinforcement had to be bent in an "S-curve" to conform to the shape of the plastic and the strap.

Same hole drilling process as the other pair of shoes (also used a de-burring bit to clean up the holes after drilling).

Used six screws.
The screws on the strap material actually go through a piece of plastic that's still inside the strap.


The three screws that go through the strap are too long.

Used a thin cut-off wheel (on an air tool) to cut off the screws.


Done.
Both repairs need to last a few weeks/months.
I plan to buy some new shoes early next year...

Went for a ride.
The "bodge" #3 held up, for now.
The repair on this pair is pretty un-noticable...


Replacing the rear cassette on the Cannondale -- part 2 -- cleaning the rear hub to get it ready to accept the replacement cassette

I've done less than 10 rides on this new chain.
It's already pretty dirty and quite a bit of sand has collected on it.
I'll take the chain off and soak it in some cleaning fluid (Simple Green) to loosen the grease and dirt.

Meanwhile, I'm going to install a chain that I've had for awhile.
It's a chain made by KMC (Taiwanese company).  This one is unique in that it's got a coating of DLC (Diamond Like Coating) on it.
DLC is a very hard coating and is very durable and slippery.

When I worked for Toyota, there was an issue of the driveshaft splines sticking on the Tacoma & Tundra trucks.
They tried various countermeasures that didn't really work (like applying more grease, improving the machining of the splines, etc.)
The fix/countermeasure that really finally worked was to treat the splines with DLC.  The supplier that did the DLC coating could not keep up with the demand, and for awhile there wasn't enough improved parts coming from Japan to take care of all the customer complaints.


The DLC chain that I bought was used and had some grease on it.
I soaked it in the cleaner for a few days (in this jar) to remove the grease before installing it on the bike.

After I removed the DLC chain, I put the dirty chain from above in the same jar to sit for a few days...

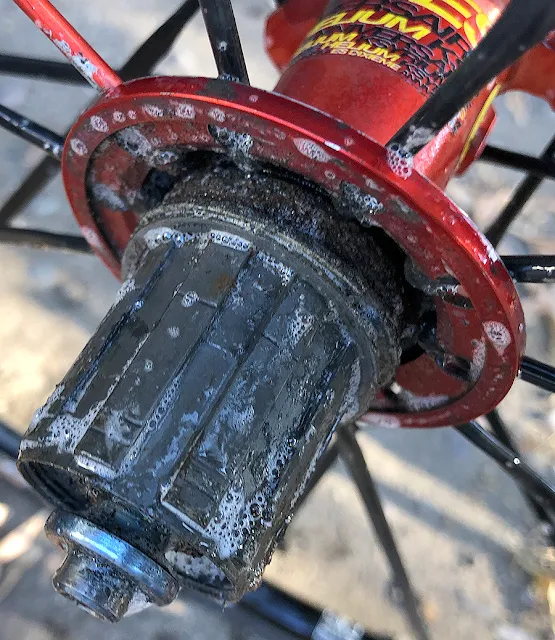
The very dirty freewheel hub is being cleaned.
This is mid-cleaning...

Used an old toothbrush to remove the grease and sand...
This is still mid-cleaning.
It's getting better...

Overview of the entire wheel after cleaning of the hub.

Hub is pretty clean.

The area at the end of the hub is also pretty clean.


Since I was at it, I cleaned the entire hub...

This is the non-drive side of the rear hub, after cleaning.

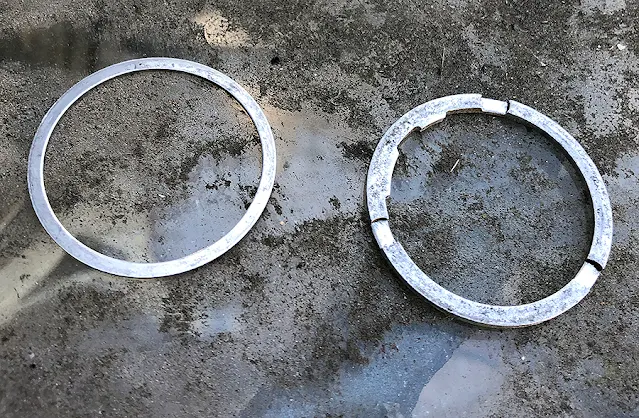
There are two spacers on the hub that's installed before the gear cassette.
They're pretty dirty also & need cleaning.

After cleaning...

The first spacer is being installed.

Then the washer was installed.
The hub is ready to accept the cassette.


Tubulars...

Since I figured out what was wrong with the rear cassette (gears on the rear wheel), I've been riding on a spare set of wheels.
One issue with these wheels is that they run tubular tires.
Tubulars are usually used for racing (most Pros use tubular tires).
As the name implies, these tires are tubes.
In essence, they're like the inner tube and tire combined into one part.

They are usually glued to the wheels.
It's a somewhat messy process and requires skill to install correctly.
Recently, there's an alternative where a double sided tape is used instead of glue.
I've installed a pair of tires on one of my "antique" bikes and it seemed to work fine (no issues on test rides).

The problem is that if you do get a flat, there's no way to fix it and keep going...
Would either have to walk home (not really an option when wearing bike shoes with no "walking" soles) or get picked up...