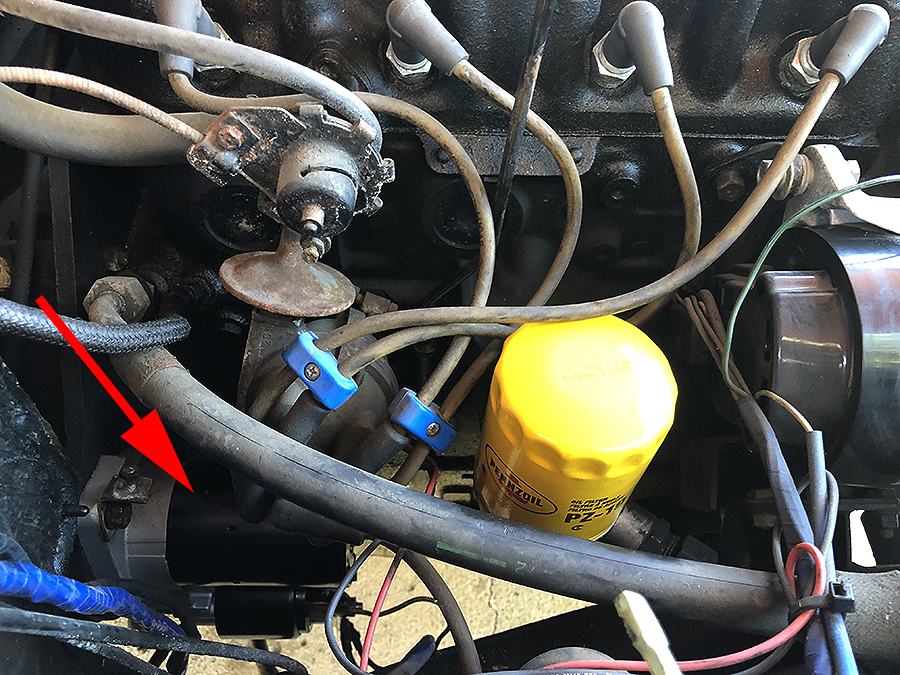
The upper arrow is pointing to the upper mounting bolt for the starter.
The lower arrow is pointing to a ground stud that's on a bracket that goes behind the upper starter mounting bolt.
My guess is that this ground was used for the original wiring harness. But, is not used now. The car had a wiring fire and the previous owner replaced much of the wiring harness on the car (especially in the engine bay). The new wiring is easy to pick out by the blue tape wrapping...
This bolt is about 9/16" but a socket is somewhat loose on the bolt.
I used a special socket that can accommodate the loose fit without rounding the bolt.
It's strange that the bolt is not exactly 9/16"... The bottom bolt is exactly 9/16" and a normal socket worked perfectly...
This is the lower mounting bolt for the starter. Access is a little bit tough with a socket/ratchet but with the right swivel and extension, it worked out OK.
Fortunately, both bolts were not stuck and came off relatively easily.
The old starter may actually be the starter that originally came with the car. It's a Lucas brand, which was the main supplier for most of the electrical components on the car.
The replacement starter has a different arrangement of the two spade connectors.
As can be seen in the picture, only one of the two connections is used by the wiring.
This is the new starter, as installed.
The new starter is much smaller and lighter than the original.
It's also equipped with a reduction gear setup to more easily spin up and turn/start the engine (progress...).
The red arrows point to the wiring installed to the new starter.
There's four different connectors.
As can be seen below, the spade connector was mounted to the upper location.
The other spade connection point is on the other side of the solenoid (unlike the original starter which has the two spade connections next to each other).
The lower starter mounting bolt. Because the new starter is smaller, installing the lower bolt was a bit easier (more space).
Looking down at the passenger side of the engine bay.
The starter is about 25% smaller and lighter...
I checked the condition of the gear teeth on the flywheel, just using my hand.
The section that I can access through the starter hole seemed OK. No chipped or missing teeth...
The new starter as installed, as viewed from below
And from above...
The old starter & old filter...
All done for now.
Car lives on the street...
Don't care for the luggage rack but don't want to have the exposed holes if I remove it...
I could just plug the holes with some rubber or chrome caps...
I wonder if they make a bike rack that fits on the luggage rack?
Maybe I can adapt a roof-top bike rack to fit on the luggage rack...?