Wednesday, June 19, 2019

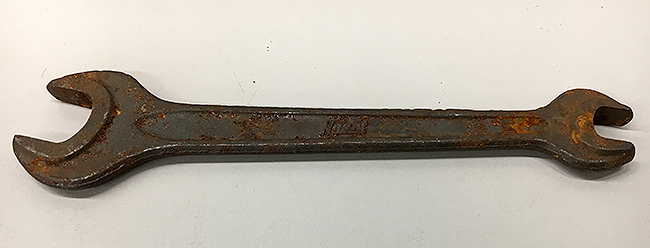
Three Jaguar Wrenches -- Before & After Cleaning


After Cleaning
I think these were originally finished in black in the middle portion.  When cleaning, I tried to leave as much of the black finish on it, while removing the surface rust.


The bottom one has been cleaned.  The other two still need to be...


After Cleaning


After Cleaning


All three after cleaning

Honda & Hazet Wrenches -- Before & After Cleaning


After Cleaning


After Cleaning


Repairing the Front Brake and Derailleur -- Part 9 (replacing the bar tape after the lever replacement)


Need to remove the old bar tape from the RH side

Reinstalled the Fizik bar padding on the LH side of the handle bar

Added the small pieces of the padding around the brake lever

Added the strip of bar tape that came with the package for padding the brake lever clamp area

After installing the new bar tape on both sides

I reused the old cap that goes on the end of the bar for the LH side because it has a reflector built into it.  Used the cap that came with the new bar tape for the RH side.

On the RH side, I have the phone mount in place.  So, I stopped the bar tape short of the phone mount.  Don't want to install the phone mount over the bar tape.

Tuesday, June 18, 2019

Chevy Pickup -- Restored and painted like the truck Honda first used in 1959 to start selling scooters and small motorcycles in the USA


Some spare skewers


Screws - Grips - Rear Derailleur - Valve Stem Caps

These are spare screws that seem to fit a lot of the steering wheels (to the hubs). 

These spare grips don't fit the Cannondale 6-13 Dura-Ace levers...  Don't know what they fit. 
They do have this round interface at the top of the grips like the ones on the Cannondale 6-13.


The Dura-Ace hood is on the left.  The shape is very different... 

Comparing to another spare brake/shift lever that I have, it also doesn't match the shape... 

This is a spare rear derailleur like the one I put on the Teledyne.  The one that I put on the Teledyne doesn't seem to work right so will try swapping with this one... 


The Schwinn Superior had broken valve stem caps.  I had these spares...

Repairing the Front Brake and Derailleur -- Part 8 (finished the installation of the brake cable and the front derailleur shift cables)

The front derailleur shift cable enters the brake lever at this middle point.

This is a closeup of the shift cable end inside of the brake lever where it bottoms out.

The front derailleur shift cables exits on the side of the lever and the cable housing sits inside of the captured area on the side of the lever.  This setup has an adjuster built inline with the cable housing (black barrel shaped piece).  By turning the barrel shaped piece, the front derailleur can be "micro" adjusted.

The Teflon coated new front derailleur cable goes through this plastic cable guide attached to the bottom of the bottom bracket area.

Then the cable comes out through this tube (part of the plastic bottom bracket cable guide) and goes into the front derailleur cable clamp.

The front derailleur cable guide ends and sits in this built-in cable guide support at the headtube.

The brake cable housing is taped in place along the handle bar and guided under the bar.

This is a view looking up at the bottom of the bar and showing the second place that it's taped in place.  The handle bar tape/wrap will ultimately keep the cable housing in place.


Trimmed the new brake cable to length and squeezed on a cable end protector (this one is gold color).

Also trimmed the front derailleur shift cable short and put a cable end protector on it.  I cut this cable pretty short so that my leg won't hit it while pedaling.